Sulphiting
Potassium metabisulphite in wine: how much, when and how
When, how much and how to add sulphites, without disrupting malolactic fermentation.
Read more


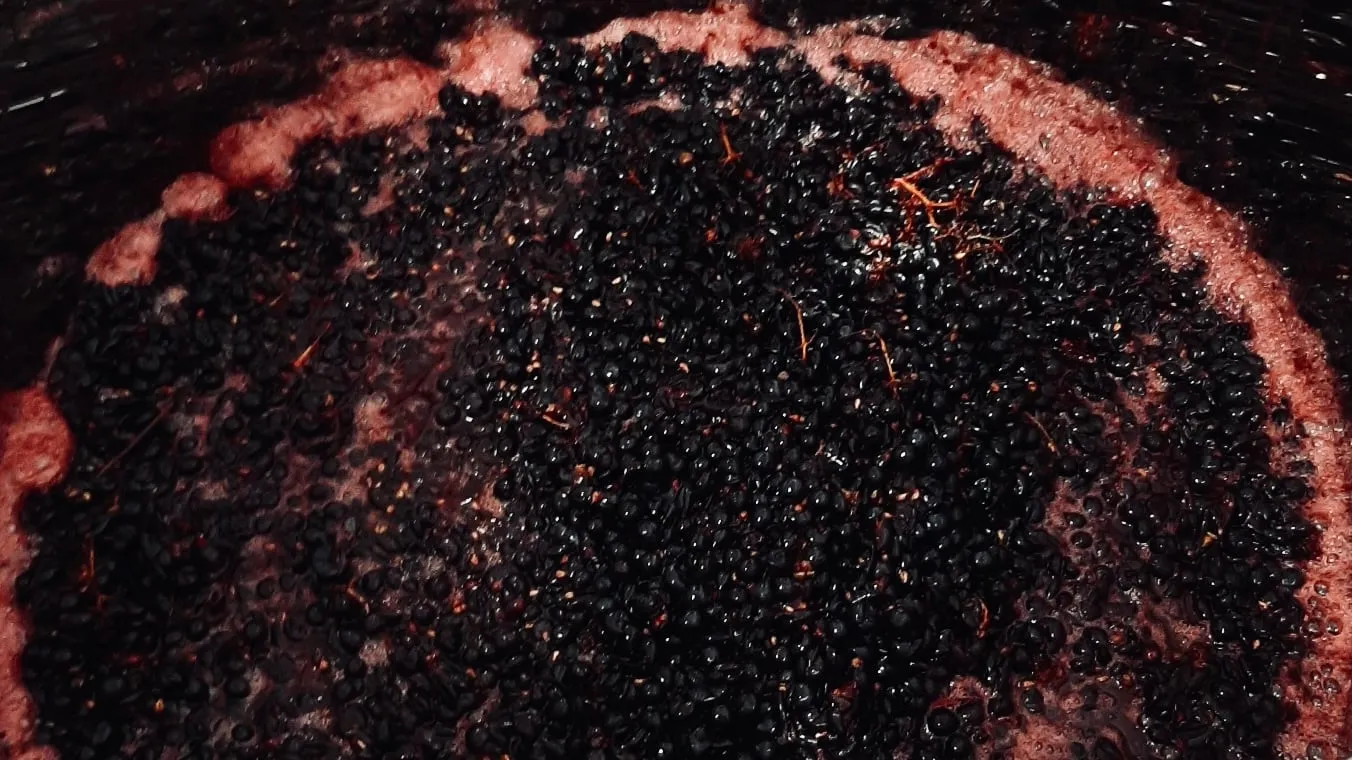
For the vast majority of artisanal winemakers, alcoholic fermentation is the most stressful moment in making their homemade wine: fermentation that doesn’t start, lacks vigour, gives off weird smells… Many problems can happen during these crucial weeks that determine the quality of the wine. Yet online resources are scattered across vineyard websites, wine shops and forums on the subject. What’s more, they very often deal with only one problem at a time and stay at the surface of it. For all these reasons, a complete, practical and exhaustive article on the subject is needed.
First of all, you should know that managing fermentation temperature is the key to success. I also recommend using a suitable thermometer. Here are the main temperature ranges to keep in mind:
These ranges assume access to refrigeration to cool the vat below a house’s ambient temperature (about 20°C). Without access to a fridge, a cellar or a large enough cool room, aiming for 12 to 18°C for a white wine can prove difficult in practice. The coolest room in the house, or an unheated basement, is then the best option.
It’s the most worrying situation and one that frequently happens to amateur winemakers who don’t use commercial yeasts. Since there can be many causes, they are covered from the most likely to the least likely.
It’s very common for the temperature of the vat to be too cold for fermentation to start, especially if your home is air-conditioned or the vat sits on a concrete floor like in a garage. As mentioned above, natural yeasts are finicky and need a precise temperature range to start quickly, unlike those of commercial origin. It’s not an absolute rule, though: fermentations can start in all sorts of conditions outside that range!
How can you easily raise the temperature? Take the vat out on the balcony during a nice fall afternoon so the sun naturally warms the grape juice. Be careful not to overheat the vat, for example beyond 27°C, since that could let other unwanted bacteria become active. A temperature above 30°C could even kill the natural yeasts.
Fermentation could also start below those temperatures but, depending on the case, it might prove too slow and so allow other unwanted yeasts or bacteria to proliferate (see the section “Why does my fermentation give off a strange smell or look odd?”). A telling example is the Brettanomyces yeast, also called “Brett,” which produces the typical “wet leather” and “horse” smell characteristic of certain natural wines. Fermentation speed is the artisanal winemaker’s best weapon against Brett here, since once the natural yeasts are fermenting optimally, they take up all the available sugar.
Natural yeasts are finicky and can have been eliminated by mistake in several ways:
If one of these scenarios seems likely, or the vat has already been taken out on a nice sunny afternoon as suggested in the previous paragraph and nothing is happening, the yeasts are probably dead. Don’t panic! Any winemaking or beer brewing shop sells commercial yeasts. As for which variety to use, I recommend Lalvin 71B, which is suited to young wines, like a good share of homemade wines are.
Finally, here is a procedure for activating commercial dry yeasts every time:
Within 24 hours, fermentation will have begun and will be recognizable by a foam forming on the surface of the juice as well as a fruity smell and the release of carbon dioxide (CO₂).
It’s rather rare (and even more so in Québec given our climate!), but it happens that the grape’s Brix level, abbreviated Brix, that is, the number of grams of sugar per 100 grams of liquid, is so high that it gets in the way of fermentation. Watch for this when a grape above 26°Brix is picked. A refractometer lets you measure the Brix of a grape right in the field!
In that case, there are several options to consider:
Add bottled spring water to the juice: This will bring it back to around 23°Brix. Water dilutes sugar, after all!
Add a sugar-tolerant commercial yeast: As with many winemaking problems, commercial yeasts have a solution to offer, and here it’s called Lalvin EC-1118, which tolerates an impressive 18% alcohol by volume before becoming ineffective.
Welcome your next sweet wine with open arms: If not all the sugar is converted, it’s no big deal: it will be delicious just the same. The resulting wine will be what’s called a “sweet” wine because it contains a good amount of residual sugar. You will, however, need to prevent what’s called a “refermentation,” which could start in the bottle in the months to come. There are two ways to do that:
If the Brix isn’t measured in the field, you’ll need to measure the specific gravity of the juice once pressed, with a hydrometer. It’s also a very useful tool for determining whether fermentation is finished. These 2 measurements also determine the potential alcohol: if all the sugar in a wine at 26°Brix or 1.1103 specific gravity is fermented, a wine at 15.9% alcohol by volume will be obtained. For other conversions, I’ve added a table below to make your life easier.
| Brix | Specific gravity | Potential alcohol (%) |
|---|---|---|
| 18 | 1.0741 | 10.1 |
| 19 | 1.0785 | 10.8 |
| 20 | 1.0830 | 11.5 |
| 21 | 1.0875 | 12.2 |
| 22 | 1.0920 | 12.9 |
| 23 | 1.0965 | 13.6 |
| 24 | 1.1011 | 14.4 |
| 25 | 1.1057 | 15.1 |
| 26 | 1.1103 | 15.9 |
It’s extremely rare for this to happen and, truth be told, I’ve never met anyone it happened to. As proof, my friend Étienne manages every year, without intervention, to ferment Vitis riparia, that is, North America’s wild grapevine, which is very acidic given its hardiness. Acidity can however be a stress factor for natural yeasts which, when combined with other causes such as a temperature that’s too low or a high Brix, can get in the way of fermentation. There’s not much to do besides measuring your juice’s pH with pH test strips and acting on the other factors: a normal pH is between 3.2 and 3.6. Careful! These strips don’t work with red wine.
Fermentation has started but it’s very slow or even stuck. The symptom is easy to measure: a specific gravity, which normally goes down day after day in an optimal fermentation, stays almost the same after several days. To fix that, a few solutions:
It’s unlucky, but sometimes a juice is contaminated by unwanted bacteria and yeasts that the natural yeasts can’t manage to overcome. To that end, I’ve gathered the signs to look for and the various solutions in the following table, ranked by the seriousness of the micro-organism involved.
| Visual symptoms | Smell and taste symptoms | Micro-organism responsible | Recommended remedy |
|---|---|---|---|
| None, or very slightly cloudy juice | Smells of leather, stable, clove; acrid taste | Brettanomyces yeasts (“Brett”) | Do nothing! It will be part of the cuvée and its story |
| Whitish cloudy juice, sometimes filaments | Smell of rancid butter, yogurt; fatty or cheesy taste | Lactic bacteria | Accept the flaw if there is no vinegary taste, or wait until fermentation ends then sulphite to 50 mg/L |
| Slimy film on the surface, abnormal bubbles even after fermentation ends | Smell of vinegar, solvent; prickly in the mouth | Acetic bacteria | Immediately sulphite to 50 mg/L and cut off all contact with oxygen. In the worst cases, the cuvée may have to end up as vinegar |
| White, grey or greenish film on the surface | Smell of mould, mushroom or damp earth | Moulds | Remove the whole film without mixing, then sulphite to 50 mg/L. There is a strong chance the cuvée will have to be thrown out anyway |
A few practices are worth following to prevent all these ills and so ensure a trouble-free fermentation. Here they are:
That’s it, everything’s been said. Now all that’s left is to wait for it to ferment!
I also want to express my gratitude to Véronique Lemieux, who gave me an enormous helping hand by reviewing the winemaking concepts presented here. For those interested in her wines, you’ll find them on Instagram (@les_cuvees_de_veronique).

Written by
Samuel
Apprentice winemaker in Montréal. I share what works here, and above all what goes wrong.
Sulphiting
When, how much and how to add sulphites, without disrupting malolactic fermentation.
Read more
Beginner mistakes
Making your own wine isn’t complicated, in theory. Here are the beginner mistakes that can turn it to vinegar.
Read more
Clarification
Store-bought wines are crystal clear thanks to additives. Yet you can do without them.
Read moreLa Liste · follow my journey · in French
The best of my small-batch winemaking, sent in French every once in a while.
I measure the site’s audience with Google Analytics, to see which articles are useful. It sets cookies and sends information about your visit to Google, in the United States, only if you agree. Learn more